Custom Survey Status
Survey Status
Survey Status represents the current stage of a survey, assessment, or data collection process within a governance framework. It provides insights into the survey\'s lifecycle, detailing the present stage, past modifications, and requirements for subsequent steps. Customizing survey statuses ensures a consistent and accurate representation of progress, which aids in evaluating and mitigating risks related to privacy and security.
By tracking survey statuses, organizations can streamline the assessment of data assets, align processes with data privacy regulations, and identify potential gaps in governance. This functionality promotes transparency, accountability, and compliance, enabling organizations to manage their data governance initiatives effectively.
HOW TO CREATE A SURVEY STATUS:
To create a new Survey Status, execute the following steps.
In the Hamburger menu, click on Survey module.
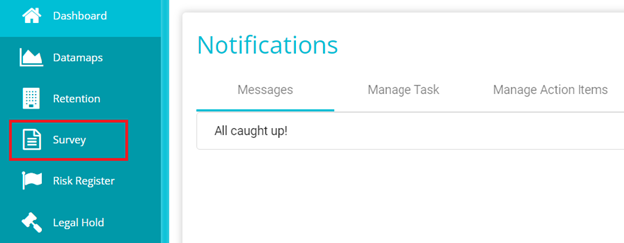
In the top right corner, click on the toggle to disable Distribution View.

And click on Edit for Survey you wish to add a or customise the Survey Status for.
You will then be redirected to the Survey Generator where you can find the Survey Status button on the right side.
-Here, you can create a custom survey status by pressing on New or reconfigure existing Statuses.
Note: Survey status will be available for only existing surveys. User trying to create a new survey, survey status won\'t be available. User must first create the survey, then again click on edit to add status

- When creating a new Survey Status, enter the Status Name
Note: Status Name cannot be empty and must adhere to the limit of 100.

For example, consider the following survey:
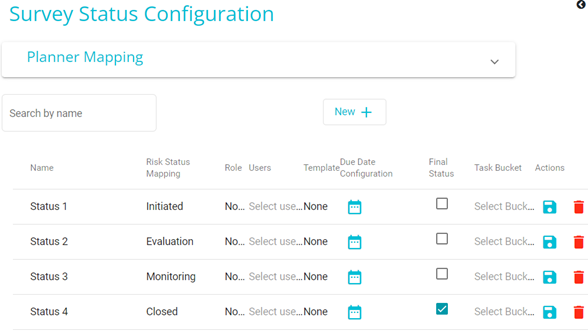
Let's create a new status for this survey:
Enter new status name under name filed:
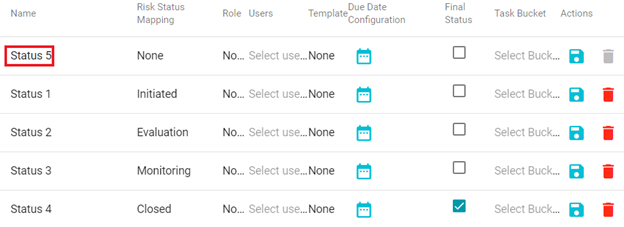
Click on save icon to save the status
The survey status can be viewed & changed at three different places
Enable Distribution View toggle

Under the survey status field, users can view statuses by clicking on the dropdown.

User can configure the Status preferred from the drop-down menu.
Once the Survey Status has been selected from the drop-down menu, click on the Update button on the top right of the screen.
The status will be updated:

In the top right corner, click on the toggle to disable Distribution View.

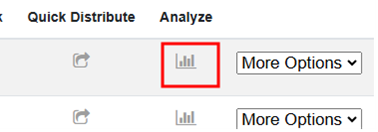
Click on Analyze icon
Select the user group from the drop-down menu
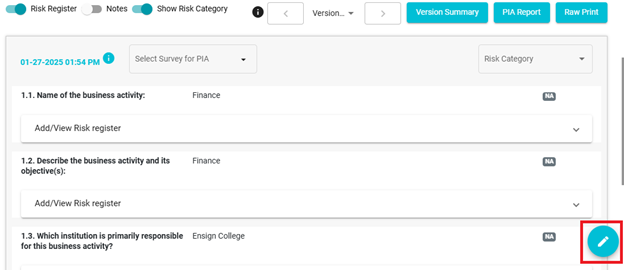
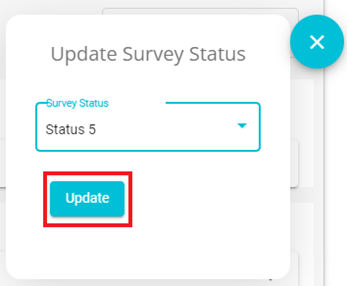
Users can view and change the survey status by clicking the Update status icon in the bottom right corner.
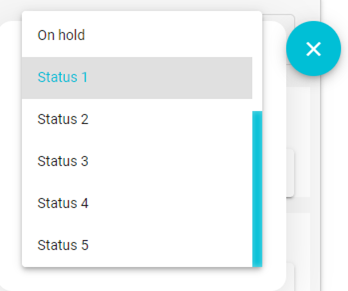
Click on the dropdown to view the list of statuses
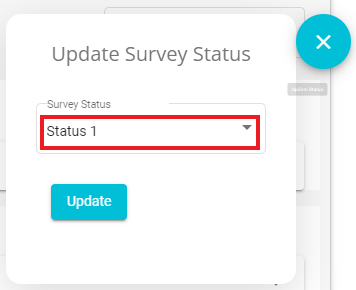
User can configure the Status preferred from the drop-down menu.
Once the Survey Status has been selected from the drop-down menu, click on the Update button
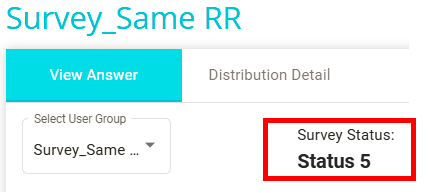
In the top right corner, click on the toggle to disable Distribution View.

Click on Analyze icon
Click on Distribution Detail
Under the survey status field, users can view statuses by clicking on the dropdown

User can configure the Status preferred from the drop-down menu.

Once the Survey Status has been selected from the drop-down menu, click on the Update button

To notify a specific user group on each survey status change. We can assign user group or an individual from the user group. Users can select the required group by clicking the drop-down under role field.
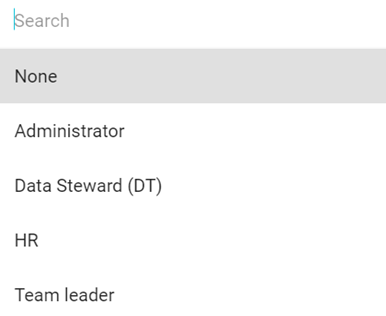
Under users the people that belong to selected permission groups can be found, you can select specific users that need to be notified.
If there's no user selected, the notifications will be sent to all the users under the group.

and Templates are used to authenticate emails sent for the specific survey status. It is configurable and to be selected from the drop-down.
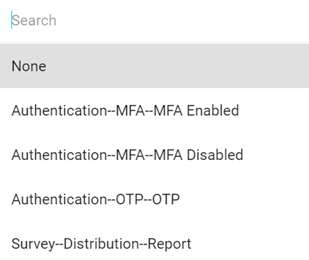
Due Date Configuration
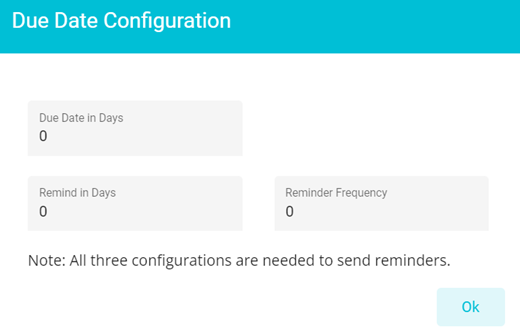
-Enter the Due Date in Days upon SLA, Remind in Days, and Reminder Frequency using the arrows for down and up.
FOR EXAMPLE: By default, the status will be \"Pending Review\". Once it is assigned to any Team, they will be notified so there should be an SLA to complete the review. If not, we need to send an auto reminder before the Due Date.
If the Questionnaire is moved to \"Incident Response Team\" and they have 5 days (Due Date) of Time to review. We should send them a Reminder on the 3rd or 4th day. The frequency of reminder should be configured in. Once the \"Incident Response Team\" reviews' completed it will be moved to \"Legal Team\" queue and the process continues until it reaches the \"Final Review Completed\"
NOTE: You can create multiple other Survey Statuses in case the one created prior has been foregone.
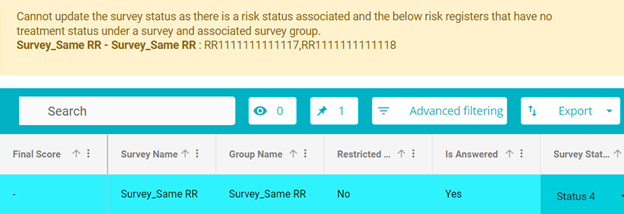
-Checking the Final Status box will understand it to be the final status of the Survey notifying the Users/ Survey groups on the completion of the survey reviewing process. It is not possible for a status to be the final status unless any Risk register associated with the survey group/distribution has not specified the "Treatment status".
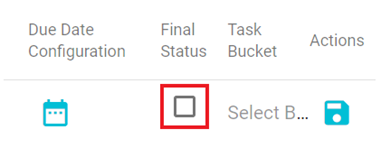
In Actions, you have the option to Save and Delete the status.
Risk Mapping
Every assessment has some risk associated with it if that has risk registers configured, and the risk status can be mapped to survey status through following steps:
Select from the drop-down menu- None, Initiated, Evaluation, Monitoring, or Closed. Risk Status Mapping corresponds to the Risk Status entered in the Risk Register of the survey.
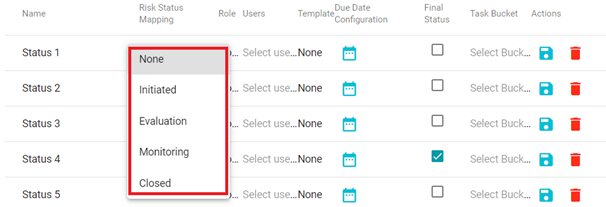
NOTE: If the "Treatment status" is not specified. User cannot move the distribution to "Final status".
You can alternatively, also change it at another location.
Disable Distribution View.
Click on Analyze.
Select the user group from the drop-down menu
Enable Risk Register.
Scroll down, click on Add/View Risk Register
In the Search bar, click on New to create a risk register or click on a pre-existing Risk Registers to view more details about it
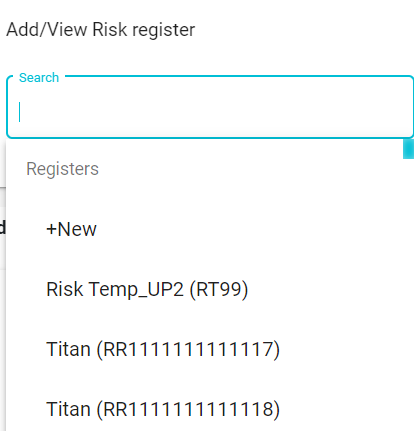
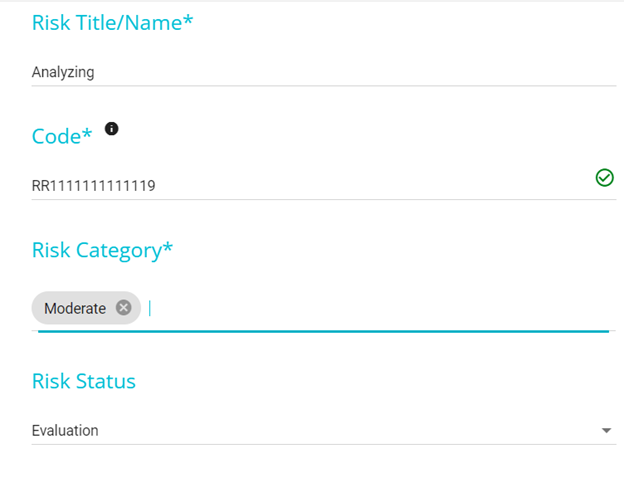
NOTE: Risk Status is Initiated by default.
To change the Risk Status, click and choose from the drop-down menu.
The Final Status can only be marked once the item has been reviewed and closed at each stage of the process. Users cannot move to final status if any Risk register associated with the survey group/distribution does not have treatment status updated.
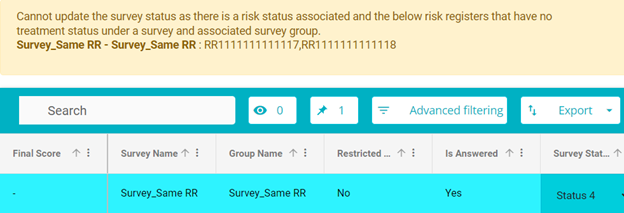
To Update treatment status:
User can configure the Status preferred from the drop-down menu under the treatment status field.
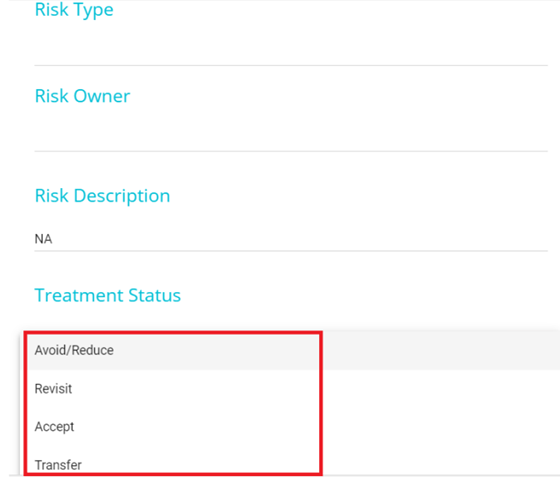
Click on the save button once selected.
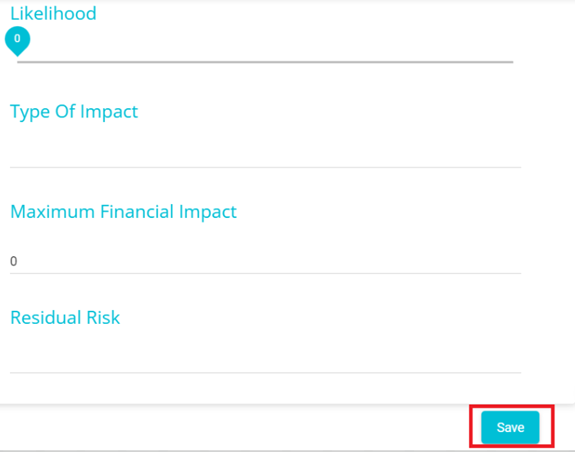
For example, Let's see how risk mapping changes with change in survey status:
Consider this survey:
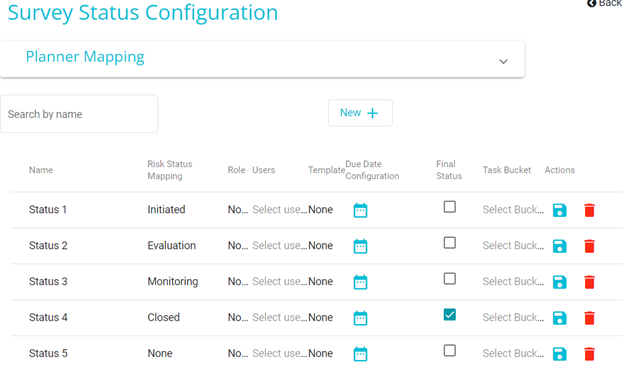
The status of this survey can be viewed by following below steps:
Enable Distribution View toggle

Under the survey status field, the status of the survey can be viewed

To view the current Risk mappings of the associated risk registers:
Disable Distribution View.
Click on Analyze.
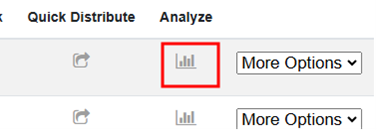
Select the user group from the drop-down menu
Enable Risk Register.
Scroll down, click on Add/View Risk Register
View any associated risk register to know the current risk mapping
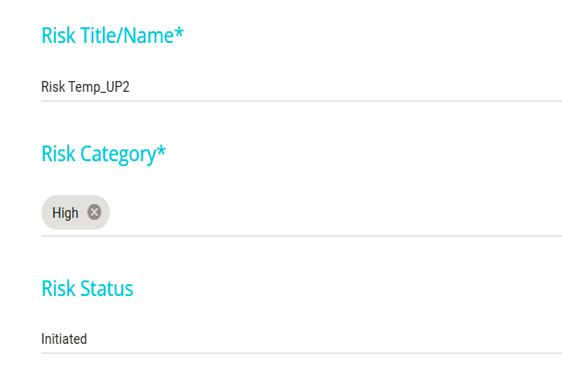
Now let's change the survey status:
Select the Status preferred from the drop-down menu.
Once the Survey Status has been selected from the drop-down menu, click on the Update button on the top right of the screen.
The status will be updated, and the following message will be displayed:
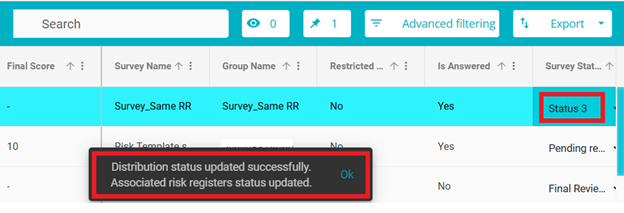
Now let's see the mappings of associated risk registers:
Disable Distribution View.
Click on Analyze.
Select the user group from the drop-down menu
Enable Risk Register.
Scroll down, click on Add/View Risk Register
View the associated risk register to know the current risk mapping:
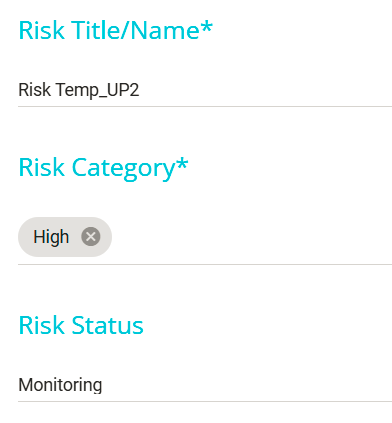
The risk status got changed from Initiated to Monitoring when survey status is changed from Status 1 to Status 3.
Let's observe the same change through another way:
Disable Distribution View.
Click on Analyze.
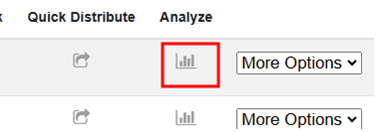
Select the user group from the drop-down menu
Click on the Update status icon
You can view the status of the survey --
Configure the Status preferred from the drop-down menu.
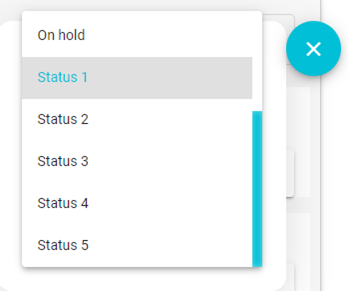
Once the Survey Status has been selected from the drop-down menu, click on the Update button
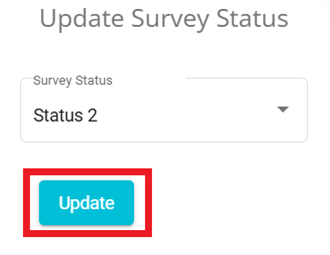
Now, click on Add/View Risk Register
View the associated risk register to know the current risk mapping:
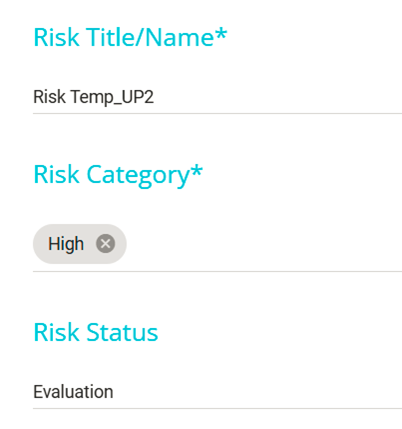
The risk status got changed from Monitoring to Evaluation when survey status is changed from Status 3 to Status 2.
Let's observe the same change in third way:
In the top right corner, click on the toggle to disable Distribution View.
![]()
Click on Analyze icon
Click on Distribution Detail
Under the survey status field, you can view the status of the Survey:
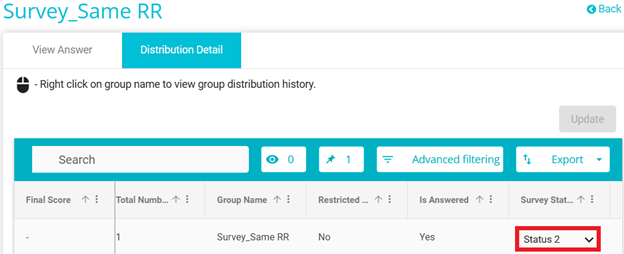
Configure the Status preferred from the drop-down menu.

Once the Survey Status has been selected from the drop-down menu, click on the Update button

The status will be updated, and the following message will be displayed:

Now let's see the mappings of associated risk registers:
Disable Distribution View.
Click on Analyze.
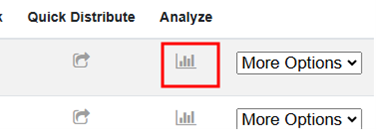
Select the user group from the drop-down menu
Enable Risk Register.
Scroll down, click on Add/View Risk Register
View the associated risk register to know the current risk mapping:
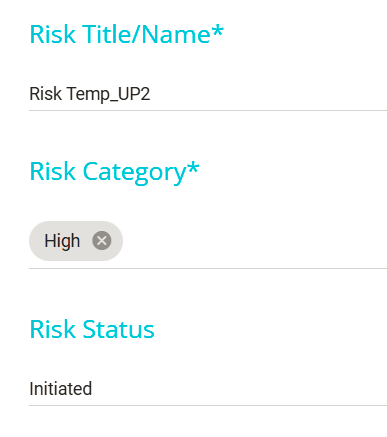
The risk status got changed from Evaluation to Initiated when survey status is changed from Status 2 to Status 1.
TO INTEGRATE MICROSOFTF PLANNER:
Click on Settings.
Select External Integrations.
From the drop-down, click on Microsoft Planner.

Click on ADD
In the configuration table, enter the following details.
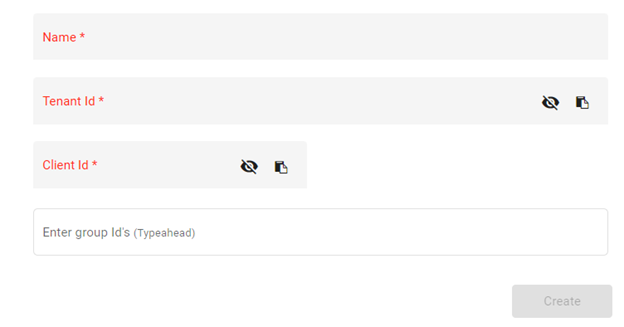
Name: Name of the Planner you wish to add in creation.
Tenant ID: Enter the Tenant ID.
Client ID: Enter the Client ID.
Group IDs: Enter multiple optional group IDs.
The upside of adding Group IDs in the MS Planner configuration is so that only the IDs added have access to the specific Survey's Task Bucket.
Ensure to login to your MS Planner account to wire it to Survey.
To do so, click on MS Login on the Distribution View screen.
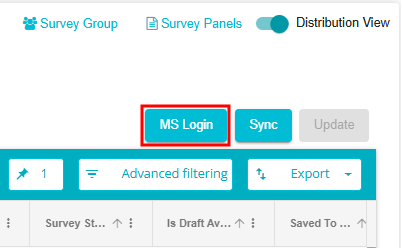
Post 24 hours, you will be notified to log in again into your account to access data in it as your token expires.
In the following tab, enter your credentials for the Microsoft Planner account.
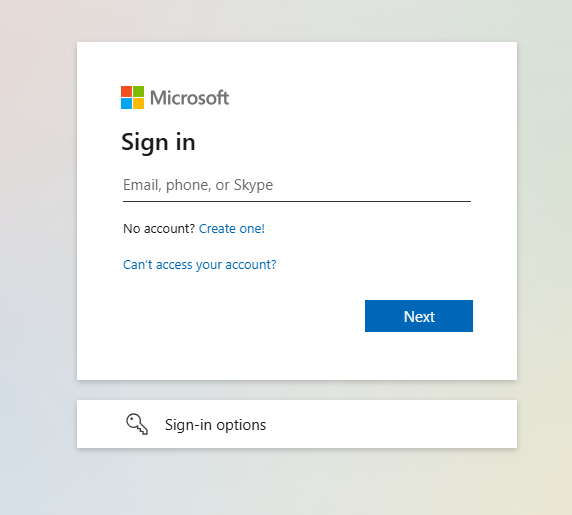
Once you have logged in, click on My Plans.
Here, select from the plans available.
Your planner should look something like this.
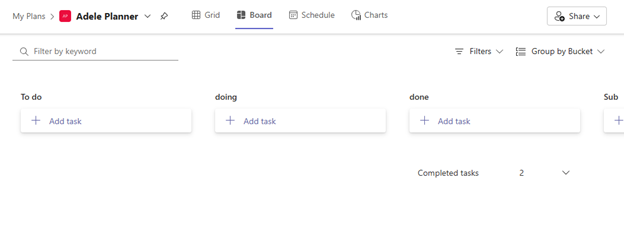
These individual columns are known as Task Buckets. They help map each task into a bucket which can be configured for the Survey Status. Based on the mappings a task will be created and moved to relevant buckets on survey status change.
In the Survey Status Configuration, once integrated, enter the following information.
Under the Task Bucket field, the user needs to select buckets from the drop down for corresponding status.

If you haven't already logged in while selecting your group, you will be asked to login to your MS account.
Post 24 hours, you will be notified to log in again into your account to access data in it as your token expires.
Once log in is complete, you will be able to view your Planner account as well as the data in your Survey Status configuration.
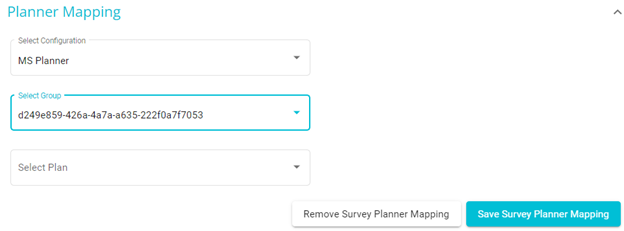
Select Configuration from the drop-down.
Select the group from the drop-down.
This functionality restricts access, allowing you to view only the data within your designated group to which you have been granted permissions.
Further, select plan from the drop-down menu and click on Save Survey Planner Mapping.
From the drop-down option, select the configuration.
And select the Group and Plan you would like to proceed with.
When you need to login to MS Planner, click on MS Login which will redirect you to the login screen.
You will only be liable to the data in your specific group with which you have been given access to by the Admin.
To configure the Survey Status, click on Survey Status in the Distribution View.

Choose the configured statuses.
To apply updates made in Survey Status or changes configured in the Distribution View, click the Sync button. This action manually synchronizes updates and allows the user to incorporate planner changes into existing surveys at their convenience. Syncing ensures the seamless progression of survey phases, such as transitioning from Phase 1 to Phase 2, while maintaining alignment with the latest configurations.
If you attempt to use a configured status wired to a task bucket in the MS Planner, you will be notified to log in before you Sync.
The Final Status can only be marked once the item has been reviewed and closed at each stage of the process. Users cannot move to final status if any Risk register does not have treatment status updated.
